(That's right, Code Camp is coming! 11/8 and 11/9 again at Foothill College)
Article Series
So, first, a little background. As many of you know, I've been the ring leader of Silicon Valley Code Camp here in northern California for the past 2 years. Since Code Camp is a limited budget, 100% volunteer effort, the most important thing is to have efficient communications between everyone. Attendees, Speakers, Organizer, Sponsors and everyone else involved in the event. To that end, the first code camp web site was created. It was based on CSS provided by Microsoft. Check out the post I made two years ago about it titled "Zero to Professional Web Site in Two Days".
This year, we are planning on a different format. I don't want to give too much away because we have not formally announced the changes, but if you look carefully at the designs, you might get an idea what these changes are going to be. I'm getting slightly off topic. The purpose of this series of articles to take you with me, step by step through building the web site. This time,
we are going to do it right. Professional Designer (volunteer) and Professional CSS Implementer (not me, but we do have some budget for this from last year).
So, here are the steps.
- Decide on what changes need to be made
- Work with a professional designer to make mock ups (photoshop, fireworks, etc.)
- Create css and html pages from the designers work
- Implement the css and html in asp.net
- Test
- Publish
So far, we have done steps 1,2 and are working on step 3. I've alluded to the requirements above, but don't want to spoil too many surprises. Suffice to say, that is done already. Step 2 is also now complete. The professional designer gave us very detailed PSD files that we can turn over to a css wizard. First, let me show you some of the designs and peek into fireworks to see what is actually under the covers.
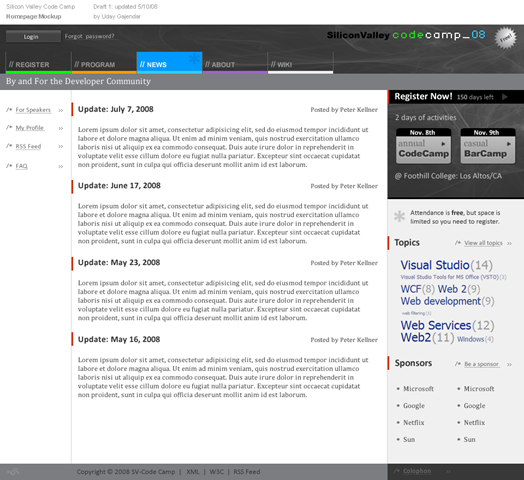
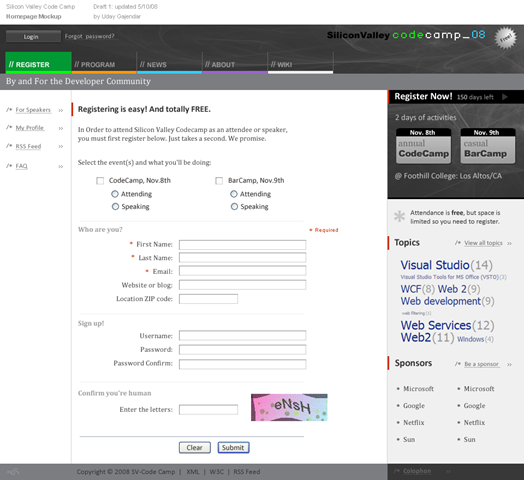
First, here are some screen shots of what pages will look like (png files created from the PSD files)
![svc_home[2]](/wp/wp-content/uploads/2008/05/svc-home2.png) |
 |
 |
 |
Include is also a PDF file. It allows the person doing the css and html to really do a good job of pulling the pieces apart to make great web content.
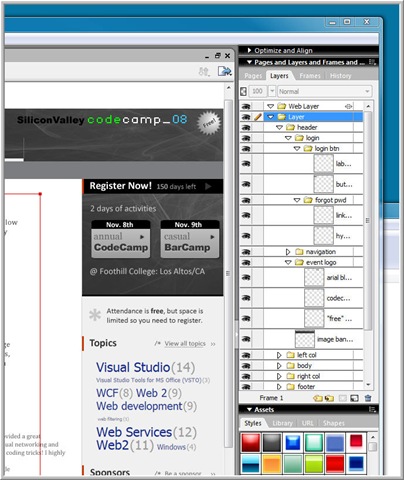
(notice the detailed names for all the layers! this kind of consistency makes it much easier to implement in html and css).
Step 3 is to hand this over to a designer. I did not have someone to use locally, so I decided to take a shot at using rentacoder. I posted a detailed specification which you can see on that site if you navigate to this url:
http://www.rentacoder.com./RentACoder/misc/BidRequests/ShowBidRequest.asp?lngBidRequestId=924960
Notice the detailed specifications as well as the 13 bids that have been made ranging from $100 to $1000. I posted a question on the forums asking if anyone had used any of these services and the response was yes, but don't take the lowest bid and also make sure you use someone with lots of experience. I haven't decided next steps yet (that is who to choose), but I will keep posting as I build this web site.
Stay tuned!