TL;DR
I had a fully working React/TypeScript photo gallery web app and wanted a native iOS companion that would give users that buttery-smooth, Apple Photos-like browsing experience. Despite never having written a line of Swift, I vibe-coded the entire native iOS module — complete with a custom UICollectionView grid, multi-tier image caching, a native HTTP image pipeline, pinch-to-zoom with HD fetching, and LRU memory management — using Claude AI (Opus 4.6) and OpenAI Codex (ChatGPT 5.3) as my AI pair programmers.
Fair warning: this is a ridiculously long post. If you’re wondering why, you’ll want to read the note from the author at the bottom first.
The App: Connection Road
Connection Road is a photo and video gallery that connects to your cloud storage (Dropbox, Google Drive, OneDrive) and gives you a beautiful way to browse and share your photos. Your media stays in your own cloud account; Connection Road just provides the viewing experience. You can browse the demo gallery to see it in action — the “Biking in Europe” album is the one I’ll use for examples throughout this post.
The Starting Point: A React/TypeScript Web App
The web app is a full-featured photo gallery built with Next.js 15 and React 19. It connects to cloud storage providers (Dropbox, Google Drive, OneDrive, AWS S3), lets users browse folders of photos, view them in various grid layouts, and includes features like image editing, captions, GPS metadata display, and video playback. The backend runs on Node.js with Prisma ORM, Redis caching, and Sharp for image processing.
On a desktop browser, this works great. The CSS grid layouts are responsive, the image loading is optimized, and you get a solid photo browsing experience. But on a phone? Let me be real: no matter how good your CSS is — and modern CSS is genuinely impressive — a mobile browser rendering a photo grid is not in the same league as native. You’re running layout calculations in a browser engine, compositing through WebKit’s rendering pipeline, and fighting for GPU access alongside everything else the browser is doing. There’s no pinch-to-zoom on the grid itself, scrolling through hundreds of photos has visible jank, and the whole experience just doesn’t feel native — because it isn’t.
Web vs. Native: The Difference
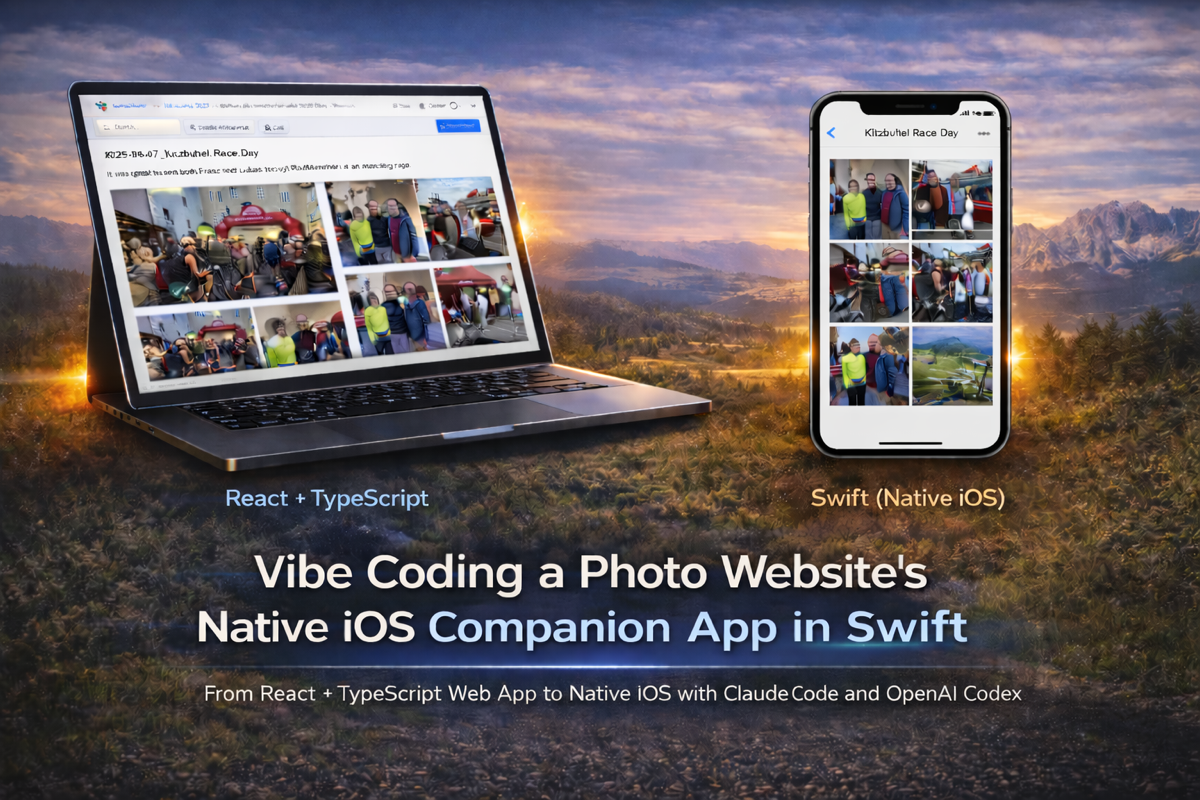
Here’s how the same “Biking in Europe” album looks and feels on web versus native iOS. These are the same photos — the difference is entirely in how they’re presented.
Desktop Browser (React + TypeScript):

On the web, photos are displayed in a CSS columns masonry layout on a light #f9fafb gray background with gaps between images. Each photo keeps its natural aspect ratio. You navigate with mouse clicks, hover to see edit buttons, and scroll with the browser scrollbar. It works well on desktop — CSS grid and flexbox are fantastic for layout, and I genuinely admire what the CSS team has accomplished. But on a phone, scroll a grid of 48 full-color photos and you’ll feel it. The browser has to decode images through its own pipeline, run layout in the main thread, composite layers, and manage memory with no direct access to the platform’s image I/O system. You get occasional frame drops, delayed image rendering, and that subtle but unmistakable “this is a web page” feel.
Native iOS (Swift UICollectionView) — 3 columns:

The native app is a completely different experience — and I don’t mean “slightly better.” I mean the kind of difference you feel in your fingers. The same biking photos — the Alpine mountain roads, the race start in the Austrian town — are displayed edge-to-edge as square tiles on a pure black background with zero spacing between them. Native Swift code talks directly to Core Animation, decodes images through ImageIO at the exact pixel size needed, manages a GPU-ready bitmap cache, and recycles cells through UICollectionView’s battle-tested cell reuse system. No browser layer in between. No JavaScript bridge. No CSS layout engine recalculating on every scroll event. Just compiled machine code pushing pixels.
Here’s what you get on native that the web simply cannot match:
Pinch to zoom between 1 and 6 columns — Spread your fingers and the grid smoothly animates from a dense 6-column thumbnail grid down to a 3-column view, then 2-column, then a single full-width image:
- 6 columns: Tiny thumbnails (64px) — you can see all 48 photos at once without scrolling. The app uses
thumb-64sized images from the server to keep memory low. - 3 columns: The default view. Square cropped thumbnails fill the screen. Each photo loads as a standard
thumbresolution image. Caption and GPS badges appear as small dots in the corner. - 2 columns: Larger tiles. The app starts loading
previewresolution images and crossfades them over the thumbnails. - 1 column: Full-width single image. The app fetches
displayresolution images. After 2.5 seconds of idle time, caption and GPS icon buttons fade in on photos that have metadata. Tap a photo to flip the card and see the caption text or a map showing where the photo was taken. - Pinch again at 1 column: Enters HD zoom mode — pinch to zoom up to 6x into the full-resolution image:

The whole thing scrolls at a locked 60fps with prefetching — as you scroll, UICollectionViewDataSourcePrefetching predicts which cells are coming into view and pre-fetches their thumbnails. A multi-tier in-memory image cache holds up to 1GB of decoded pixel data across 5 cache tiers (thumb-64, thumb-128, thumb-192, thumb, and detail/display). When iOS sends a memory warning, each cache evicts its oldest 50% to stay alive.
Here’s the thing the web can’t replicate: on native, every image is pre-decoded into a GPU-ready bitmap before the cell scrolls into view. There’s zero decode-on-display latency. The forceDecoded pattern (which I’ll explain later) draws each image into a fresh bitmap context immediately after download, so when Core Animation needs pixels for a cell, they’re already sitting in RAM in the exact format the GPU wants. Try doing that from a browser — you can’t. The browser owns the image decode pipeline, decides when and how to decode, and gives you no control over the bitmap format. Even the best lazy-loading JavaScript library with IntersectionObserver and requestAnimationFrame is still at the mercy of the browser’s compositor. Sorry, CSS team — I love what you’ve built, and will-change and content-visibility are clever optimizations, but they’re optimizations within the browser sandbox. Native code doesn’t live in that sandbox.
Why I Was Wary
I’ve been programming for decades. I know JavaScript, TypeScript, C#, Java, C++, C, Pascal, and even Fortran and PL/1. But Swift? Never touched it.
And this wasn’t going to be a “Hello World” app. Looking at what I needed:
- A custom
UICollectionViewwith an exact pixel-perfect grid layout (not the built-inUICollectionViewFlowLayout, which adds unwanted spacing) - A multi-tier image caching system with separate caches for different thumbnail resolutions (64px, 128px, 192px, full thumb, detail/display, and a separate HD zoom cache)
- A native HTTP image pipeline that batches requests, deduplicates in-flight fetches, and decodes images off the main thread
- An LRU eviction strategy that stays within a 1GB memory budget
- Pinch-to-zoom gestures that smoothly transition between column counts
- An HD zoom mode that fetches and displays full-resolution JPEG images
- Integration with React Native via Expo Modules
This is not trivial in any language. In a language I’d never used? I was genuinely worried.
But then I thought: this is exactly the kind of thing vibe coding with AI assistants is made for. I know what I want. I understand the architecture and the algorithms. I just don’t know the Swift syntax, the UIKit APIs, or the iOS-specific patterns. Claude AI (Opus 4.6) and OpenAI Codex (ChatGPT 5.3) can fill that gap.
The Architecture: React Native Shell + Native Swift Module
Before diving into the Swift code, here’s how the pieces fit together:

The React Native side handles navigation, API authentication, and the overall app shell. But the heavy lifting — the photo grid rendering, image caching, and gesture handling — is all native Swift, exposed as an Expo Module.
The React Native Bridge: PinchGrid.tsx
The React Native component that bridges to native is relatively straightforward. Here’s the key part:
import { NativeZoomGridView } from '../../../modules/native-zoom-grid/src';

export default function PinchGrid({
  items,
  sections,
  siteId,
  galleryGuid,
  apiBaseUrl,
  pinchZoomQuality,
  initialColumns = 0,
  ...props
}: PinchGridProps) {
  const nativeItems = useMemo(() => {
    return items.map(item => ({
      id: item.path,
      path: item.path,
      thumbUrl: getThumbUrl(item),
      previewUrl: getPreviewUrl(item),
      displayUrl: getDisplayUrl(item),
      hasTransformsRequiringOriginal: item.hasTransformsRequiringOriginal,
      ...(item.caption ? { caption: item.caption } : {}),
      ...(item.location ? { latitude: item.location.latitude,
                            longitude: item.location.longitude } : {}),
      ...(item.isVideo ? { isVideo: true } : {}),
    }));
  }, [items]);

  return (
    <NativeZoomGridView
      style={styles.grid}
      items={nativeItems}
      sections={sections}
      siteId={siteId}
      galleryGuid={galleryGuid}
      apiBaseUrl={apiBaseUrl}
      pinchZoomQuality={pinchZoomQuality}
      initialColumns={initialColumns}
      minColumns={1}
      maxColumns={6}
      spacing={2}
      captionEditingEnabled={captionEditingEnabled}
      navBarTitle={navBarTitle}
      navBarShowHomeButton={navBarShowHomeButton}
      bottomBarViewStyle={bottomBarViewStyle}
      bottomBarShowSections={bottomBarShowSections}
      bottomBarHasVideos={bottomBarHasVideos}
      bottomBarMediaFilter={bottomBarMediaFilter}
      bottomBarVisible={bottomBarVisible}
      onItemPress={handleItemPress}
      onVideoPress={handleVideoPress}
      onRequestThumbBatch={handleRequestThumbBatch}
      onRequestDisplayBatch={handleRequestDisplayBatch}
      onLongPressItem={handleLongPressItem}
      onZoomEnter={handleZoomEnter}
      onZoomExit={handleZoomExit}
      onNavBarHomePress={handleNavBarHomePress}
      onBottomBarViewStyleChange={handleBottomBarViewStyleChange}
      onBottomBarMediaFilterChange={handleBottomBarMediaFilterChange}
      onDebugLog={handleDebugLog}
      // ... more event handlers
    />
  );
}
This component transforms the TypeScript media items into a flat array of dictionaries that the native Swift module can consume. The native module then owns everything about rendering, scrolling, caching, and gestures — including the nav bar, a bottom bar with view style and media filter controls, caption editing via long-press, and video playback. Events flow back up to React Native for things like navigation, batch loading coordination, and caption save results. The onDebugLog callback routes performance logs and error messages from native to the JS logging system.
Now let’s get into the real meat: the Swift code.
Deep Dive: Every Swift Component Explained
1. NativeImageRequest.swift — The Type Foundation
Every good system starts with well-defined types. This file establishes the vocabulary for the entire image loading system.
enum NativeImageTarget: String {
  case thumb
  case thumb64 = "thumb-64"
  case thumb128 = "thumb-128"
  case thumb192 = "thumb-192"
  case preview
  case display
  case zoom
}
What this does: Swift enums are far more powerful than TypeScript enums. This NativeImageTarget enum uses raw string values (specified with = "thumb-64") so each case maps to a specific string. The String raw type means you can convert between the enum and strings with NativeImageTarget(rawValue: "thumb-64"). This enum represents the different resolution tiers in the image pipeline — from tiny 64px thumbnails for dense grids up to full HD zoom images.
enum NativeImagePriority: Int, Comparable {
  case background = 0
  case prefetch = 1
  case visible = 2
  case zoom = 3

  static func < (lhs: NativeImagePriority, rhs: NativeImagePriority) -> Bool {
    lhs.rawValue < rhs.rawValue
  }
}
What this does: This enum conforms to Comparable by implementing the < operator. In Swift, protocols (like interfaces in TypeScript) can require specific methods. By giving each case an Int raw value, priorities are automatically ordered. The static func < is Swift’s operator overloading — it lets you write if priority1 < priority2 naturally.
struct NativeImageRequest: Identifiable {
  let id: String
  let itemId: String
  let path: String
  let url: String
  let size: String
  let target: NativeImageTarget
  let priority: NativeImagePriority
  let targetPixelSize: CGSize?
  let hasTransformsRequiringOriginal: Bool

  var transport: NativeImageTransport {
    switch target {
    case .zoom:
      return .singleGet
    default:
      return .batchPost
    }
  }

  var dedupeKey: String {
    return url + "|" + size + "|" + target.rawValue
  }
}
What this does: struct in Swift is a value type (copied on assignment, like TypeScript plain objects but with compile-time enforcement). let properties are immutable — once created, a request can’t be modified. The Identifiable protocol requires an id property, which Swift uses for things like list diffing.
The computed properties transport and dedupeKey are like TypeScript getters. The transport property uses a switch statement (Swift’s switch is exhaustive — the compiler will error if you don’t handle every case). The ? after CGSize means targetPixelSize is an Optional — Swift’s type-safe equivalent of null. Unlike TypeScript where null can sneak in anywhere, Swift forces you to explicitly handle optionals.
struct NativeImageResult {
  let requestId: String
  let itemId: String
  let url: String
  let target: NativeImageTarget
  let image: UIImage?
  let error: Error?

  var success: Bool { image != nil }
}
What this does: The result type carries either an image or an error (or neither if the request was cancelled). UIImage? is an optional — nil means no image was loaded. The success computed property checks for non-nil using != nil.
2. NativeImageDecoder.swift — Efficient Image Decoding
This small but critical file handles decoding raw image data into UIImage objects efficiently using Apple’s ImageIO framework.
import UIKit
import ImageIO

final class NativeImageDecoder {
  static func downsample(
    data: Data,
    targetSize: CGSize?,
    scale: CGFloat = UIScreen.main.scale
  ) -> UIImage? {
    let options: [CFString: Any] = [
      kCGImageSourceShouldCache: false,
      kCGImageSourceCreateThumbnailFromImageAlways: true,
    ]

    guard let source = CGImageSourceCreateWithData(
      data as CFData, options as CFDictionary
    ) else {
      return nil
    }

    let maxDimension: CGFloat
    if let targetSize {
      maxDimension = max(targetSize.width, targetSize.height) * scale
    } else {
      guard let properties = CGImageSourceCopyPropertiesAtIndex(
        source, 0, nil
      ) as? [CFString: Any],
            let width = properties[kCGImagePropertyPixelWidth] as? CGFloat,
            let height = properties[kCGImagePropertyPixelHeight] as? CGFloat
      else {
        return decodeFullSize(source: source)
      }
      maxDimension = max(width, height)
    }

    let thumbOptions: [CFString: Any] = [
      kCGImageSourceShouldCache: true,
      kCGImageSourceCreateThumbnailFromImageAlways: true,
      kCGImageSourceThumbnailMaxPixelSize: maxDimension,
      kCGImageSourceCreateThumbnailWithTransform: true,
    ]

    guard let cgImage = CGImageSourceCreateThumbnailAtIndex(
      source, 0, thumbOptions as CFDictionary
    ) else {
      return decodeFullSize(source: source)
    }

    return UIImage(cgImage: cgImage, scale: scale, orientation: .up)
  }
What this does: This is the performance secret weapon. Instead of decoding a full 4000x3000 JPEG into memory and then scaling it down, CGImageSourceCreateThumbnailAtIndex tells ImageIO to decode only the pixels we need. If we need a 200x200 thumbnail, we never allocate memory for the full image.
Let me break down the Swift-specific patterns:
final class: Thefinalkeyword means this class cannot be subclassed. Swift uses this for performance — the compiler can use static dispatch instead of dynamic dispatch for method calls.static func: Like TypeScript’sstaticmethods. No instance needed.guard let: This is Swift’s version of an early return with unwrapping.guard let source = ...means “unwrap this optional, and if it’s nil, execute theelseblock (which must return/throw/break).” After theguard,sourceis guaranteed to be non-nil. It’s like TypeScript’sif (!source) return nullbut the compiler tracks the non-nil guarantee.if let targetSize: Swift 5.7 shorthand forif let targetSize = targetSize— unwraps the optional and binds it to the same name.[CFString: Any]: A dictionary withCFStringkeys andAnyvalues.CFStringis a Core Foundation type (C-level string), andas CFDictionarybridges it to the C API that ImageIO expects.kCGImageSourceThumbnailMaxPixelSize: Thesek-prefixed constants are from Apple’s C APIs. Swift imports them as global constants.
  static func decodeFromBase64(_ base64String: String) -> UIImage? {
    guard let data = Data(base64Encoded: base64String) else { return nil }
    guard let rawImage = UIImage(data: data) else { return nil }
    return forceDecoded(rawImage)
  }
What this does: Decodes a base64 string (received from batch API responses) into a UIImage, then force-decodes it. The forceDecoded function (defined in NativeZoomGridModule.swift) draws the image into a new bitmap context, which forces the GPU-ready pixel data to be generated immediately rather than lazily during scrolling. This is a common iOS performance optimization — without it, the first time a cell scrolls into view, there’s a decode stall.
3. NativeImagePipeline.swift — The Network Layer
This is the HTTP client that fetches images from the server. It supports both single-image GET requests (for HD zoom) and batched POST requests (for thumbnails).
final class NativeImagePipeline {
  static let shared = NativeImagePipeline()

  private let session: URLSession
  private let serialQueue = DispatchQueue(label: "NativeImagePipeline.serial")
  private let concurrentQueue = DispatchQueue(
    label: "NativeImagePipeline.concurrent", attributes: .concurrent
  )
  private var inFlightRequests: [String: NativeImageRequest] = [:]
  private var activeRequestIds: Set<String> = [:]
  private let lock = NSLock()
What this does:
static let shared: The Singleton pattern in Swift.letmakes it immutable and thread-safe (Swift guaranteesstatic letis initialized exactly once, lazily, in a thread-safe manner).URLSession: Apple’s built-in HTTP client. It handles connection pooling, HTTP/2, and certificate pinning under the hood.DispatchQueue: Grand Central Dispatch (GCD) queues.serialQueueprocesses tasks one at a time.concurrentQueueallows multiple tasks simultaneously. This is how you do multithreading in iOS.NSLock: A mutual exclusion lock. Swift doesn’t have built-insynchronizedblocks like Java, so you manually lock/unlock. The patternlock.lock(); defer { lock.unlock() }is idiomatic —deferruns when the scope exits, guaranteeing unlock even if an error is thrown.[String: NativeImageRequest]: A dictionary (like TypeScript’sRecord<string, NativeImageRequest>).Set<String>: A hash set for O(1) lookups of active request IDs.
  init() {
    let config = URLSessionConfiguration.default
    config.httpMaximumConnectionsPerHost = 4
    config.timeoutIntervalForRequest = 30
    config.timeoutIntervalForResource = 60
    session = URLSession(configuration: config)
  }
What this does: Configures the URL session with a maximum of 4 concurrent connections per host (to avoid overwhelming the server), a 30-second timeout per request, and a 60-second total resource timeout.
The deduplication logic is key:
  func submit(
    _ request: NativeImageRequest,
    completion: @escaping (NativeImageResult) -> Void
  ) {
    lock.lock()
    let dedupeKey = request.dedupeKey
    if inFlightRequests[dedupeKey] != nil {
      lock.unlock()
      return
    }
    inFlightRequests[dedupeKey] = request
    activeRequestIds.insert(request.id)
    lock.unlock()

    switch request.transport {
    case .batchPost:
      // batch handling...
    case .singleGet:
      fetchSingle(request: request, completion: completion)
    }
  }
What this does:
_ request: The underscore means the first parameter has no external label. You callpipeline.submit(myRequest)notpipeline.submit(request: myRequest). This is a Swift convention for the most “obvious” parameter.@escaping: This annotation tells Swift the closure will outlive the function call (it’ll be called later when the network request completes). Without@escaping, Swift assumes closures are used immediately and can optimize memory management.- Deduplication: Before starting a new fetch, we check if an identical request (same URL + size + target) is already in flight. If so, we skip it. This prevents the common problem of scrolling back and forth triggering duplicate fetches.
The batch POST method is the main thumbnail fetcher:
  func submitBatch(
    requests: [NativeImageRequest],
    apiBaseUrl: String,
    siteId: String,
    galleryGuid: String,
    completion: @escaping ([NativeImageResult]) -> Void
  ) {
    // ... deduplication ...

    var httpRequest = URLRequest(url: url)
    httpRequest.httpMethod = "POST"
    httpRequest.setValue("application/json",
                        forHTTPHeaderField: "Content-Type")

    let body: [String: Any] = [
      "items": batchItems,
      "size": size,
    ]
    httpRequest.httpBody = try JSONSerialization.data(
      withJSONObject: body
    )

    session.dataTask(with: httpRequest) { [weak self] data, response, error in
      guard let self else { return }
      // ... error handling ...
      self.concurrentQueue.async {
        self.processBatchResponse(
          data: data,
          requestMap: requestMap,
          dedupedRequests: dedupedRequests,
          completion: completion
        )
      }
    }.resume()
  }
What this does:
[weak self]: This is a capture list for the closure. In Swift, closures capture references to objects they use.[weak self]makesselfa weak reference, preventing retain cycles (memory leaks).guard let self else { return }then unwraps it — if the pipeline was deallocated, we bail out. This pattern is everywhere in iOS development.session.dataTask(with:).resume(): URLSession tasks start in a suspended state. You must call.resume()to actually start the network request. Forgetting.resume()is a classic iOS bug.concurrentQueue.async: The response processing (JSON parsing + image decoding) happens on a background queue, keeping the main thread free for UI.
The cancellation system is elegant:
  func cancel(requestId: String) {
    lock.lock()
    activeRequestIds.remove(requestId)
    lock.unlock()
  }

  func isStale(requestId: String) -> Bool {
    lock.lock()
    defer { lock.unlock() }
    return !activeRequestIds.contains(requestId)
  }
What this does: Rather than actually cancelling the HTTP request (which is complex and unreliable), we simply remove the request ID from the active set. When the response arrives, isStale() returns true and we skip processing. This is a pragmatic approach — the network request completes but we throw away the result. It’s much simpler than trying to cancel URLSession tasks.
4. DetailLRUCache.swift — LRU Eviction for High-Res Images
This is a custom LRU (Least Recently Used) cache specifically designed for display-resolution and preview-resolution images.
class DetailLRUCache {
  private struct CacheEntry {
    let image: UIImage
    let cost: Int
    var lastAccessed: CFTimeInterval
  }

  private var entries: [String: CacheEntry] = [:]
  private let lock = NSLock()
  private let budgetBytes: Int
  private let maxCount: Int

  private(set) var totalBytes: Int = 0
  var count: Int {
    lock.lock(); defer { lock.unlock() }; return entries.count
  }

  static var onLog: ((String) -> Void)?
What this does:
private struct CacheEntry: A nested struct that’s only visible within this class. Each entry stores the image, its memory cost in bytes, and when it was last accessed.private(set) var totalBytes: Theprivate(set)modifier means the property can be read from outside the class but only written from inside. This is finer-grained than TypeScript’sreadonly— in TypeScript you’d need a getter.var count: Int: A computed property that acquires the lock, reads the count, and releases the lock — all in one line. Thedeferensures unlock happens even if something goes wrong.static var onLog: A static callback for debug logging. The type((String) -> Void)?is an optional closure — it’s either a function that takes a string and returns nothing, ornil.
  func get(_ key: String) -> UIImage? {
    lock.lock()
    defer { lock.unlock() }
    guard var entry = entries[key] else { return nil }
    entry.lastAccessed = CACurrentMediaTime()
    entries[key] = entry
    return entry.image
  }
What this does: This is the LRU part. Every time an image is accessed, we update its lastAccessed timestamp. CACurrentMediaTime() returns a high-resolution monotonic clock (Core Animation timer), which is more precise and doesn’t change when the system clock adjusts. Note the guard var entry — we need var because we’re modifying lastAccessed. Since CacheEntry is a struct (value type), we have to write it back with entries[key] = entry.
  func set(_ key: String, image: UIImage) {
    let cost = Int(image.size.width * image.size.height
                   * image.scale * image.scale * 4)
    lock.lock()
    defer { lock.unlock() }

    if let existing = entries[key] {
      totalBytes -= existing.cost
    }

    entries[key] = CacheEntry(
      image: image, cost: cost,
      lastAccessed: CACurrentMediaTime()
    )
    totalBytes += cost
    NativeCacheStatsTracker.shared.recordDetailInsert(
      key: key, image: image, cost: cost
    )
  }
What this does: The cost calculation width * height * scale * scale * 4 computes the actual memory footprint in bytes. The scale is the screen’s pixel density (2x or 3x on Retina displays), and * 4 accounts for 4 bytes per pixel (RGBA). An image reported as 100x100 points at 3x scale actually uses 100 * 100 * 3 * 3 * 4 = 360,000 bytes. This is important for staying within memory budgets.
The eviction logic finds and removes the oldest (least recently accessed) entries:
  private func evictUntilWithinLimits(maxBytes: Int, maxCount: Int) {
    while (totalBytes > maxBytes || entries.count > maxCount)
          && !entries.isEmpty {
      removeOldestEntryLocked()
    }
  }

  private func removeOldestEntryLocked() {
    guard !entries.isEmpty else { return }
    var oldestKey: String?
    var oldestTime: CFTimeInterval = .greatestFiniteMagnitude
    for (key, entry) in entries {
      if entry.lastAccessed < oldestTime {
        oldestTime = entry.lastAccessed
        oldestKey = key
      }
    }
    guard let keyToRemove = oldestKey else { return }
    let removedCost = entries[keyToRemove]?.cost ?? 0
    entries.removeValue(forKey: keyToRemove)
    totalBytes -= removedCost
  }
What this does: A linear scan to find the oldest entry. With typical cache sizes of a few hundred entries, this is fast enough. The ?? operator is Swift’s nil-coalescing operator (same as TypeScript’s ??).
The memory warning handler is critical for iOS apps:
  @objc private func handleMemoryWarning() {
    lock.lock()
    let countBefore = entries.count
    let bytesBefore = totalBytes

    let targetCount = entries.count / 2
    let sorted = entries.sorted {
      $0.value.lastAccessed < $1.value.lastAccessed
    }
    let toRemove = sorted.prefix(entries.count - targetCount)
    for (key, entry) in toRemove {
      entries.removeValue(forKey: key)
      totalBytes -= entry.cost
    }
    lock.unlock()
  }
What this does: When iOS sends a memory warning (the OS is running low on RAM and will kill your app if you don’t free memory), this handler evicts the oldest 50% of cached images. The @objc annotation is required because NotificationCenter (which dispatches memory warnings) uses Objective-C’s messaging system under the hood. The .sorted method with a trailing closure is Swift’s way of sorting — $0 and $1 are shorthand for the closure’s first and second parameters.
5. NativeImageCacheCoordinator.swift — Unified Cache Management
This singleton coordinates across all cache tiers and manages the separate zoom image cache.
final class NativeImageCacheCoordinator {
  static let shared = NativeImageCacheCoordinator()

  private struct ZoomCacheEntry {
    let image: UIImage
    let cost: Int
  }

  private let lock = NSLock()
  private var zoomEntries: [String: ZoomCacheEntry] = [:]
  private var zoomInsertionOrder: [String] = []
  private let zoomMaxCount = 3
  private let zoomMaxBytes = 200 * 1024 * 1024  // 200MB
What this does: The zoom cache is small but expensive — each HD zoom image can be 30-50MB of decoded pixel data. We keep at most 3 entries or 200MB, whichever is hit first. The zoomInsertionOrder array tracks FIFO order for eviction.
  func storeZoomImage(_ image: UIImage, forKey key: String) {
    let cost = Int(image.size.width * image.size.height
                   * image.scale * image.scale * 4)
    lock.lock()

    if let existing = zoomEntries[key] {
      zoomEntries.removeValue(forKey: key)
      zoomInsertionOrder.removeAll { $0 == key }
    }

    while zoomEntries.count >= zoomMaxCount
          || (currentBytes() + cost > zoomMaxBytes
              && !zoomEntries.isEmpty) {
      evictOldestLocked()
    }

    zoomEntries[key] = ZoomCacheEntry(image: image, cost: cost)
    zoomInsertionOrder.append(key)
    lock.unlock()
  }
What this does: The removeAll { $0 == key } call uses a trailing closure with $0 shorthand — it removes all elements from the array where the element equals key. The eviction loop removes the oldest entries until both the count and byte limits are satisfied.
  func clearAllCaches() {
    GridController.thumbCache.removeAllObjects()
    GridController.thumb64Cache.removeAllObjects()
    GridController.thumb128Cache.removeAllObjects()
    GridController.thumb192Cache.removeAllObjects()
    GridController.detailLRU.removeAll()
    clearZoomCache()
    NativeCacheStatsTracker.shared.clearAll()
  }
What this does: Nuclear option — clears everything. Called when navigating to a completely different gallery.
6. NativeZoomGridModule.swift — The Expo Bridge
This is where Swift meets React Native. The NativeZoomGridModule class is an Expo Module that defines the API surface exposed to JavaScript. It exposes 13 callable functions: playVideo, preloadThumbnails, five cache-apply functions (applyThumbCache, applyThumb64Cache, applyThumb128Cache, applyThumb192Cache, applyDisplayCache), clearImageCache, reloadGrid, getFirstVisibleItemId, scrollToItemId, showBottomBar, and captionSaveResult — plus a native view with over 25 props and 19 event callbacks.
import ExpoModulesCore
import AVKit

public class NativeZoomGridModule: Module {
  public func definition() -> ModuleDefinition {
    Name("NativeZoomGrid")
What this does: Module is a base class from ExpoModulesCore. The definition() method uses a declarative DSL (Domain Specific Language) to define what JavaScript can call. Name("NativeZoomGrid") sets the module name that JS imports.
    AsyncFunction("playVideo") { (urlString: String) in
      guard let url = URL(string: urlString) else {
        throw NSError(domain: "NativeZoomGrid", code: 1,
          userInfo: [NSLocalizedDescriptionKey: "Invalid video URL"])
      }

      let player = AVPlayer(url: url)
      let playerVC = AVPlayerViewController()
      playerVC.player = player

      guard let rootVC = UIApplication.shared.connectedScenes
        .compactMap({ $0 as? UIWindowScene })
        .flatMap({ $0.windows })
        .first(where: { $0.isKeyWindow })?
        .rootViewController else { return }

      var topVC = rootVC
      while let presented = topVC.presentedViewController {
        topVC = presented
      }

      topVC.present(playerVC, animated: true) {
        player.play()
      }
    }.runOnQueue(.main)
What this does: This is a callable function from JavaScript: NativeZoomGrid.playVideo(url). Let me break down the chain of calls to find the root view controller:
UIApplication.shared.connectedScenes— gets all active scenes (iPad supports multiple windows).compactMap({ $0 as? UIWindowScene })— filters to only window scenes, casting each one (and droppingnilfor non-window scenes).compactMapis like TypeScript’s.map().filter(Boolean)..flatMap({ $0.windows })— gets all windows from all scenes, flattened into one array.first(where: { $0.isKeyWindow })— finds the key (active) window?.rootViewController— optional chaining to get the root view controller
The while let presented = topVC.presentedViewController loop walks up the presentation stack to find the topmost presented controller, ensuring the video player presents on top of everything.
.runOnQueue(.main) ensures this runs on the main thread (required for all UI operations in iOS).
The thumbnail preloading function is called from JavaScript to inject pre-fetched thumbnails:
    Function("preloadThumbnails") { (items: [[String: String]],
                                      cacheType: String) in
      let isDetail = cacheType == "detail"
      for item in items {
        guard let urlKey = item["url"],
              let base64 = item["base64"],
              let data = Data(base64Encoded: base64),
              let rawImage = UIImage(data: data) else { continue }
        let image = forceDecoded(rawImage)
        let cost = Int(image.size.width * image.size.height
                       * image.scale * image.scale * 4)
        targetCache.setObject(image, forKey: urlKey as NSString,
                              cost: cost)
      }
    }
What this does: JavaScript sends an array of {url, base64} pairs. Swift decodes each base64 string into an image, force-decodes it for GPU readiness, and stores it in the appropriate cache. The guard let with continue means “if any of these are nil, skip this item and move to the next.”
The forceDecoded function is a top-level function defined at the top of the file:
func forceDecoded(_ image: UIImage) -> UIImage {
  guard let cgImage = image.cgImage else { return image }
  let colorSpace = CGColorSpaceCreateDeviceRGB()
  guard let context = CGContext(
    data: nil, width: cgImage.width, height: cgImage.height,
    bitsPerComponent: 8, bytesPerRow: 0, space: colorSpace,
    bitmapInfo: CGImageAlphaInfo.premultipliedFirst.rawValue
                | CGBitmapInfo.byteOrder32Little.rawValue
  ) else { return image }
  context.draw(cgImage,
    in: CGRect(x: 0, y: 0,
               width: cgImage.width, height: cgImage.height))
  guard let decoded = context.makeImage() else { return image }
  return UIImage(cgImage: decoded, scale: image.scale,
                 orientation: image.imageOrientation)
}
What this does: Creates a new bitmap context (essentially a pixel buffer), draws the image into it, and creates a new image from the result. This forces the JPEG/PNG decompression to happen right now rather than being deferred to the first render. The | operator combines bit flags — premultipliedFirst means alpha is pre-multiplied and comes before RGB, and byteOrder32Little means little-endian byte order (what iOS GPUs expect).
The ManagedImageCache class is a thread-safe wrapper for thumbnail images:
final class ManagedImageCache {
  private let lock = NSLock()
  private var entries: [String: UIImage] = [:]
  private let cacheType: NativeTrackedCacheType

  func object(forKey key: NSString) -> UIImage? {
    lock.lock()
    defer { lock.unlock() }
    return entries[key as String]
  }

  func setObject(_ image: UIImage, forKey key: NSString,
                 cost: Int? = nil) {
    let keyString = key as String
    let resolvedCost = cost ?? Int(image.size.width * image.size.height
                                    * image.scale * image.scale * 4)
    NativeCacheStatsTracker.shared.recordInsert(
      cacheType: cacheType, key: keyString, cost: resolvedCost
    )
    lock.lock()
    entries[keyString] = image
    lock.unlock()
  }
}
What this does: A simple thread-safe dictionary wrapper. NSString is used as the key type for compatibility with NSCache API patterns, and key as String converts between the types. The cost: Int? = nil parameter has a default value — if you don’t pass it, cost is calculated from the image dimensions.
The NativeCacheStatsTracker is a global singleton that tracks memory usage across all caches and enforces a total budget:
final class NativeCacheStatsTracker {
  static let shared = NativeCacheStatsTracker()

  private func evictUntilWithinBudgetLocked(incomingBytes: Int) {
    while totalEstimatedBytesLocked() + incomingBytes
          > GridController.totalImageCacheBudgetBytes {
      guard let oldest = oldestEntryLocked() else { return }
      evictEntryLocked(cacheType: oldest.cacheType, key: oldest.key)
    }
  }
What this does: Before inserting a new image into any cache, this checks if the total memory across all caches (thumb + thumb64 + thumb128 + thumb192 + detail) would exceed the 1GB budget. If so, it evicts the globally oldest entry, regardless of which cache it’s in. This prevents any single cache tier from starving the others.
7. NativeZoomGridView.swift — The Main Event (~5,000 lines)
This is the largest file and the core of the entire native module. It contains the data model, the custom grid layout, the collection view controller, the main view with pinch-to-zoom, and the image cell. Let’s go through each section.
Data Models
struct GridItem {
  let id: String
  let path: String
  let thumbUrl: String
  let previewUrl: String?
  let displayUrl: String?
  let hasTransformsRequiringOriginal: Bool
  var caption: String?
  let latitude: Double?
  let longitude: Double?
  let isVideo: Bool

  var thumb64Url: String {
    thumbUrl.replacingOccurrences(
      of: "size=thumb", with: "size=thumb-64"
    )
  }

  var hasDetails: Bool {
    return caption != nil || latitude != nil || isVideo
  }
}

struct GridSection {
  let title: String
  var items: [GridItem]
}
What this does: Simple value types representing the grid’s data. Note that caption uses var instead of let — captions can be edited in-place via long-press, so the model needs to be mutable for that field. The thumb64Url computed property generates the URL for the 64px thumbnail by string replacement — a pragmatic approach that avoids complex URL construction. hasDetails returns true if the item has any metadata worth showing (caption, GPS, or is a video).
ExactGridLayout — Custom UICollectionView Layout
This is where we diverge from UIKit’s built-in UICollectionViewFlowLayout:
class ExactGridLayout: UICollectionViewLayout {
  var columns: Int = 3
  var spacing: CGFloat = 0
  var sectionHeaders: [(title: String, itemCount: Int)] = []
  static let headerHeight: CGFloat = 44

  private var cellAttrs:
    [IndexPath: UICollectionViewLayoutAttributes] = [:]
  private var headerAttrs:
    [IndexPath: UICollectionViewLayoutAttributes] = [:]
  private var allAttrs: [UICollectionViewLayoutAttributes] = []
  private var contentHeight: CGFloat = 0

  override var collectionViewContentSize: CGSize {
    guard let cv = collectionView else { return .zero }
    return CGSize(width: cv.bounds.width, height: contentHeight)
  }
What this does: UICollectionViewLayout is the base class for custom layouts. You override methods to tell UIKit where every cell goes. The built-in UICollectionViewFlowLayout tries to be clever about spacing and sometimes introduces gaps between cells — unacceptable for a photo grid where we want pixel-perfect tiling.
  override func prepare() {
    guard let cv = collectionView else { return }
    cellAttrs = [:]
    headerAttrs = [:]
    allAttrs = []

    let insetL = cv.adjustedContentInset.left
    let availW = cv.bounds.width - insetL
                 - cv.adjustedContentInset.right
    guard columns > 0, availW > 0 else {
      contentHeight = 0; return
    }
    let cell = (availW - spacing * CGFloat(columns - 1))
               / CGFloat(columns)

    // Non-sectioned: simple grid
    let itemCount = cv.numberOfItems(inSection: 0)
    for i in 0..<itemCount {
      let col = i % columns
      let row = i / columns
      let x = insetL + CGFloat(col) * (cell + spacing)
      let y = CGFloat(row) * (cell + spacing)
      let ip = IndexPath(item: i, section: 0)
      let a = UICollectionViewLayoutAttributes(forCellWith: ip)
      a.frame = CGRect(x: x, y: y, width: cell, height: cell)
      cellAttrs[ip] = a
      allAttrs.append(a)
    }

    let rows = (itemCount + columns - 1) / columns
    contentHeight = CGFloat(rows) * cell
                    + CGFloat(max(0, rows - 1)) * spacing
  }
What this does: The prepare() method is called by UIKit before any layout queries. We pre-compute every cell’s exact (x, y, width, height) position. The math is straightforward:
- Cell width = available width minus gaps, divided by column count
- Each cell’s x = column index * (cell size + spacing)
- Each cell’s y = row index * (cell size + spacing)
IndexPath is UIKit’s way of addressing cells — it has a section and an item (row). UICollectionViewLayoutAttributes carries the frame, transform, and z-index for each cell.
  override func layoutAttributesForElements(
    in rect: CGRect
  ) -> [UICollectionViewLayoutAttributes]? {
    return allAttrs.filter { $0.frame.intersects(rect) }
  }
What this does: UIKit calls this to ask “which cells are visible in this rectangle?” We filter our pre-computed attributes to only those that intersect the visible area. This is how UIKit knows which cells to create/recycle.
GridController — The Data Source and Delegate
class GridController: NSObject,
    UICollectionViewDataSource,
    UICollectionViewDelegate,
    UICollectionViewDataSourcePrefetching {

  static let totalImageCacheBudgetBytes = 1024 * 1024 * 1024 // 1GB

  var gridItems: [GridItem] = []
  var gridSections: [GridSection] = []
  var currentColumns: Int = 3

  static let thumbCache = ManagedImageCache(cacheType: .thumb)
  static let thumb64Cache = ManagedImageCache(cacheType: .thumb64)
  static let thumb128Cache = ManagedImageCache(cacheType: .thumb128)
  static let thumb192Cache = ManagedImageCache(cacheType: .thumb192)
  static let detailLRU = DetailLRUCache(
    budgetBytes: totalImageCacheBudgetBytes, maxCount: 10000
  )
What this does:
NSObject: The base class for all Objective-C-compatible classes. Required here becauseUICollectionViewDataSourceand friends are Objective-C protocols.- Protocol conformance: Swift’s comma-separated protocol list is like TypeScript’s
implements A, B, C. The class must implement all required methods from each protocol. - Static caches: The image caches are
static(class-level) because they need to persist across view lifecycles. When the collection view recycles cells, the caches retain their images.
  func collectionView(
    _ collectionView: UICollectionView,
    cellForItemAt indexPath: IndexPath
  ) -> UICollectionViewCell {
    guard let cell = collectionView.dequeueReusableCell(
      withReuseIdentifier: "ImageCell", for: indexPath
    ) as? ImageCell else {
      return UICollectionViewCell()
    }
    guard let item = itemForIndexPath(indexPath) else { return cell }
    let shouldTrackThumbLoad = currentColumns <= 2

    cell.configure(
      with: item.thumbUrl,
      previewUrl: item.previewUrl,
      displayUrl: item.displayUrl,
      caption: item.caption,
      latitude: item.latitude,
      longitude: item.longitude,
      isVideo: item.isVideo,
      columns: currentColumns,
      thumbCache: GridController.thumbCache,
      thumb64Cache: GridController.thumb64Cache,
      detailLRU: GridController.detailLRU,
      showDevIndicator: showDevIndicator,
      onThumbLoaded: shouldTrackThumbLoad ? { [weak self] in
        self?.onAnyThumbLoaded?()
      } : nil
    )
    if displayLoadingEnabled {
      cell.applyCachedDisplay(lru: GridController.detailLRU)
    }
    if item.isVideo {
      cell.onPlayVideoRequested = { [weak self] in
        self?.onVideoTap?(["id": item.id, "index": indexPath.item])
      }
    } else {
      cell.onPlayVideoRequested = nil
    }
    return cell
  }
What this does: This is the core of UIKit’s cell recycling system. dequeueReusableCell either returns a recycled cell or creates a new one. The as? ImageCell is a conditional downcast — if the dequeued cell isn’t an ImageCell, we get nil and the guard returns a plain cell. This pattern is critical for scrolling performance: instead of creating thousands of cells, UIKit creates maybe 20-30 and reuses them as the user scrolls.
The shouldTrackThumbLoad check avoids unnecessary callbacks when cells are small (3+ columns) — we only need to know about thumb loading at 1-2 columns where we might trigger detail image loading. The onPlayVideoRequested callback is set for video cells so the detail card’s play button can fire a video tap event back through the bridge. If display loading is already enabled, we immediately apply any cached detail image — this avoids a blank flash when scrolling back to cells that already have high-res images cached.
The prefetching delegate is an optimization that UIKit introduced to start loading data before cells become visible:
  func collectionView(
    _ collectionView: UICollectionView,
    prefetchItemsAt indexPaths: [IndexPath]
  ) {
    var ids: [String] = []
    for indexPath in indexPaths {
      guard let item = itemForIndexPath(indexPath) else { continue }
      if item.isVideo { continue }
      if !GridController.hasVisibleThumbnailCached(
           for: item, columns: currentColumns) {
        ids.append(item.id)
      }
    }
    if !ids.isEmpty {
      onPrefetchBatch?(["ids": ids])
    }
  }
What this does: When the user is scrolling, UIKit predicts which cells will become visible next and calls this method. We check if those images are already cached, and if not, batch them into a prefetch request. This means images start loading before the user even sees the cell.
NativeZoomGridView — The Main View
This is the ExpoView subclass that React Native mounts:
class NativeZoomGridView: ExpoView {
  static var lastFirstVisibleItemId: String?

  private var collectionView: UICollectionView!
  private let gridController = GridController()
  private var gridLayout: ExactGridLayout!

  // Pinch state
  private var pinchStartColumns: Int = 3
  private var configuredInitialColumns: Int = 0

  // Zoom state machine
  private enum ZoomState {
    case inactive
    case entering
    case active
    case exiting
  }
  private var zoomState: ZoomState = .inactive
What this does:
UICollectionView!: The!is an implicitly unwrapped optional. It’sniluntilsetupView()runs, then guaranteed to be non-nil. It’s a pragmatic choice for properties that can’t be set ininitbut are set immediately after.ZoomStateenum: A private state machine for the zoom overlay. Swift enums with no raw values are just named states — the compiler ensures you handle all cases inswitchstatements.
The setupView() method wires everything together:
  private func setupView() {
    backgroundColor = .black

    gridController.onItemTap = { [weak self] payload in
      self?.onItemPress(payload)
    }

    gridController.onTapZoomItem = { [weak self] item, cell in
      self?.enterZoomFromCell(item: item, cell: cell)
    }

    gridController.onScrollEnd = { [weak self] in
      self?.onScrollEnd([:])
      self?.requestedDetailById.removeAll()
      self?.checkVisibleThumbsAndTriggerDisplayLoading()
      self?.updateFirstVisibleItemId()
      self?.startIdleDetailTimer()
    }

    gridLayout = ExactGridLayout()

    collectionView = UICollectionView(
      frame: bounds, collectionViewLayout: gridLayout
    )
    collectionView.dataSource = gridController
    collectionView.delegate = gridController
    collectionView.prefetchDataSource = gridController
    collectionView.register(
      ImageCell.self, forCellWithReuseIdentifier: "ImageCell"
    )
    collectionView.alwaysBounceVertical = true
    collectionView.contentInsetAdjustmentBehavior = .never
    addSubview(collectionView)

    let pinch = UIPinchGestureRecognizer(
      target: self, action: #selector(handlePinch(_:))
    )
    collectionView.addGestureRecognizer(pinch)

    NotificationCenter.default.addObserver(
      self, selector: #selector(handleMemoryWarning),
      name: UIApplication.didReceiveMemoryWarningNotification,
      object: nil
    )
  }
What this does:
- Closure callbacks: The
gridController.onScrollEnd = { ... }pattern is like passing callback functions in JavaScript. The[weak self]prevents retain cycles. #selector: This is Objective-C’s method selector syntax.UIPinchGestureRecognizerneeds a method to call when the gesture fires.#selector(handlePinch(_:))creates a reference to thehandlePinchmethod.NotificationCenter: iOS’s publish-subscribe system (like an event bus). We subscribe to memory warnings and various custom events.
The pinch-to-zoom gesture handler is where the magic happens:
  @objc private func handlePinch(
    _ gesture: UIPinchGestureRecognizer
  ) {
    switch gesture.state {
    case .began:
      pinchStartColumns = gridLayout.columns
      gridController.isPinching = true

    case .changed:
      // Special case: already at 1 column and zooming in further
      // → enter HD zoom mode
      if pinchStartColumns == 1 && gesture.scale > 1.0
         && zoomState == .inactive && nativePipelineEnabled {
        enterZoomMode(gesture: gesture)
        return
      }

      let safeScale = max(gesture.scale, 0.01)
      let target = max(minColumns, min(maxColumns,
        Int((CGFloat(pinchStartColumns) / safeScale).rounded())
      ))
      if target != oldColumns {
        gridLayout.columns = target
        gridController.currentColumns = target
        syncVisibleCellsToCurrentColumns()

        UIView.animate(withDuration: 0.2) { [weak self] in
          self?.gridLayout.invalidateLayout()
          self?.collectionView.layoutIfNeeded()
        }
      }

    case .ended, .cancelled:
      onPinchSettled()

    default:
      break
    }
  }
What this does: The pinch gesture has states (.began, .changed, .ended). On each .changed event, we calculate the target column count from the gesture scale. gesture.scale starts at 1.0 and increases/decreases as fingers move apart/together. We divide the starting column count by the scale to get the new column count — spreading fingers apart (scale > 1) reduces columns (zooms in), pinching together (scale < 1) increases columns (zooms out).
The UIView.animate call wraps the layout change in a 200ms animation. invalidateLayout() tells the layout to recalculate, and layoutIfNeeded() forces the layout to happen within the animation block, giving us smooth column transitions.
The HD zoom mode creates an overlay for full-resolution viewing:
  private func enterZoomMode(
    gesture: UIPinchGestureRecognizer
  ) {
    guard zoomState == .inactive else { return }
    zoomState = .entering

    let centerItem = findCenterVisibleNonVideoItem()
    guard let item = centerItem,
          let cell = cellForItem(item) else {
      zoomState = .inactive
      return
    }

    let container = UIView(frame: bounds)
    container.backgroundColor = .black

    let imageView = UIImageView(image: currentImage)
    imageView.contentMode = .scaleAspectFit
    imageView.frame = container.bounds
    container.addSubview(imageView)
    addSubview(container)

    // Fetch HD image
    let requestId = UUID().uuidString
    zoomRequestId = requestId
    fetchZoomImage(url: zoomUrl, requestId: requestId,
                   quality: quality, item: item)
  }
What this does: When the user is viewing a single-column image and pinches to zoom further, we create a full-screen overlay with the current image, then fetch the HD version in the background. Once it arrives, we crossfade to it. UUID().uuidString generates a unique ID for the request so we can match the response and detect stale results.
The fitAllIfNeeded method calculates the optimal initial column count:
  private func fitAllIfNeeded() {
    let availH = bounds.height - contentTopInset - contentBottomInset

    var best = maxColumns
    for cols in 1...searchMax {
      let cell = availW / CGFloat(cols)
      let rows = ceil(CGFloat(itemCount) / CGFloat(cols))
      if rows * cell <= availH {
        best = cols
        break
      }
    }

    let cols = configuredInitialColumns > 0
      ? min(configuredInitialColumns, maxColumns) : best
  }
What this does: Finds the minimum column count that fits all images on screen without scrolling. If you have 9 images on a square screen, 3 columns works perfectly. If you have 100 images, it’ll max out at 6 columns (the configurable maximum). The 1...searchMax is Swift’s closed range operator — like for (let i = 1; i <= searchMax; i++) in JavaScript.
The ImageCell — Where Images Get Rendered
The ImageCell class (defined at the bottom of NativeZoomGridView.swift) is a UICollectionViewCell subclass that handles everything about displaying a single photo tile:
class ImageCell: UICollectionViewCell {
  private let frontView = UIView()
  private let imageView = UIImageView()
  private let displayImageView = UIImageView()
  private let captionBadge = UIView()
  private let gpsBadge = UIView()
  private let cornerDot = UIView()
  private let playOverlay = UIView()
  private let playTriangle = CAShapeLayer()
  private var shimmerLayer: CALayer?

  // Dev resolution indicator (pre-rendered static images)
  private let devIndicatorView = UIImageView()

  // Detail icon buttons (bottom-right overlay at 1-3 columns)
  private let captionIconButton = UIButton(type: .system)
  private let gpsIconButton = UIButton(type: .system)

  // Caption quote indicator & caption bar (1-column slide-up overlay)
  private let captionQuoteLabel = UILabel()
  private let captionBar = UIView()
  private let captionBarLabel = UILabel()
  private let captionBarGradient = CAGradientLayer()

  // Details view (back of card) with paged content
  private let detailsView = UIView()
  private let segmentedControl = UISegmentedControl()
  private let captionPage = UIView()
  private let captionLabel = UILabel()
  private let gpsPage = UIView()
  private var mapView: MKMapView?
  private let videoPlayPage = UIView()
  private let videoPlayButton = UIButton(type: .system)

  // Callback for video play requests from detail card
  var onPlayVideoRequested: (() -> Void)?
What this does: Each cell has two “faces” — a front view showing the image with overlay badges, and a details view with a UISegmentedControl that pages between caption text, a GPS map, and a video play button depending on what metadata exists. The cell can flip between these views. At 1-column view, there’s also a captionBar that slides up from the bottom on tap — a more subtle way to show caption text without flipping the whole card. The shimmerLayer provides a loading animation before thumbnails arrive. The captionQuoteLabel shows a brief open-quote indicator after scroll stops, hinting that a caption is available. This is the native equivalent of the card-flip animations you might do with CSS transform: rotateY(180deg), but with far more interactive elements.
The configure method sets up a cell for a specific image:
  func configure(
    with urlString: String,
    previewUrl: String?,
    displayUrl: String?,
    caption: String?,
    latitude: Double?,
    longitude: Double?,
    isVideo: Bool,
    columns: Int,
    thumbCache: ManagedImageCache,
    thumb64Cache: ManagedImageCache,
    detailLRU: DetailLRUCache,
    showDevIndicator: Bool,
    onThumbLoaded: (() -> Void)? = nil
  ) {
    currentUrl = urlString
    currentPreviewUrl = previewUrl
    currentDisplayUrl = displayUrl
    self.showDevIndicator = showDevIndicator
    self.onThumbLoaded = onThumbLoaded
    isThumbLoaded = false
    currentColumns = columns

    // Try to load from cache immediately
    if let cached = thumbCache.object(forKey: urlString as NSString) {
      imageView.image = cached
      imageView.alpha = 1
      isThumbLoaded = true
    }
  }
What this does: When a cell is configured (either newly created or recycled), it first checks if the thumbnail is already in the cache. If so, it displays immediately with no network request. If not, the cell shows a placeholder (dark gray background) and the image will be applied later when the batch response arrives.
The applyThumbFromCache method is called when thumbnails arrive:
  enum ThumbApplyResult {
    case applied
    case alreadyLoaded
    case cacheMiss
    case noUrl
  }

  func applyThumbFromCache(
    cache: ManagedImageCache
  ) -> ThumbApplyResult {
    guard let url = currentUrl else { return .noUrl }
    if isThumbLoaded { return .alreadyLoaded }
    guard let cached = cache.object(
      forKey: url as NSString
    ) else { return .cacheMiss }

    imageView.image = cached
    UIView.animate(withDuration: 0.15) {
      self.imageView.alpha = 1
    }
    isThumbLoaded = true
    onThumbLoaded?()
    return .applied
  }
What this does: Returns a descriptive enum result instead of a boolean — the caller can distinguish between “already loaded,” “cache miss,” and “no URL.” The 150ms fade-in animation gives a polished feel when thumbnails pop in. onThumbLoaded?() uses optional chaining on the closure — if it’s nil, nothing happens.
The display/preview image upgrade method handles progressive loading:
  func applyCachedDisplay(lru: DetailLRUCache) {
    guard currentColumns <= 2 else { return }
    guard let url = currentDisplayUrl ?? currentPreviewUrl
    else { return }
    guard let cached = lru.get(url) else { return }

    displayImageView.image = cached
    UIView.animate(withDuration: 0.3) {
      self.displayImageView.alpha = 1
    }
  }
What this does: When the user zooms to 1-2 columns, the cell overlays a higher-resolution image on top of the thumbnail. The displayImageView sits on top of imageView and fades in with a 300ms animation. The ?? chains provide fallback: try the display URL first, then the preview URL.
The detail icons (caption and GPS badges) appear after 2.5 seconds of idle time:
  func showDetailIcons() {
    guard currentColumns <= 3 else { return }
    let hasCaption = currentCaption != nil
    let hasGPS = currentLatitude != nil

    if hasCaption {
      captionIconButton.isHidden = false
      UIView.animate(withDuration: 0.2) {
        self.captionIconButton.alpha = 1.0
      }
    }

    if hasGPS {
      gpsIconButton.isHidden = false
      UIView.animate(withDuration: 0.2) {
        self.gpsIconButton.alpha = 1.0
      }
    }

    detailIconsVisible = true
  }
What this does: Shows small icon buttons in the corner of each cell indicating available metadata. Tapping them flips the cell to show the detail view. At 1 column, tapping the cell itself toggles a slide-up caption bar instead of flipping — a more natural gesture for full-width images. At 2+ columns, tapping enters zoom mode. For video cells, tapping fires the video play event back through the React Native bridge. The animations give a subtle, polished feel.
What I Learned About Swift (Coming from TypeScript)
After vibe-coding thousands of lines of Swift, here are the biggest differences I noticed:
1. Optionals Are Everywhere — And That’s Good
TypeScript has optional chaining (?.) and nullish coalescing (??), but Swift takes it further. Every property, parameter, and return value explicitly declares whether it can be nil. The compiler forces you to handle nil cases. This eliminates an entire class of runtime crashes.
2. Value Types vs. Reference Types Matter
In Swift, struct is a value type (copied on assignment) and class is a reference type (shared pointer). This distinction, which TypeScript doesn’t have, affects how you design your caching layer. The GridItem is a struct because items are mostly immutable data (though caption is var to support in-place caption editing). The GridController is a class because it needs shared mutable state.
3. Memory Management Is Manual-ish
Swift uses ARC (Automatic Reference Counting), not garbage collection. This means you need to think about retain cycles with [weak self] in closures. If object A holds a strong reference to a closure that captures object A, neither will ever be deallocated. TypeScript’s garbage collector handles this automatically, so this was a new mental model for me.
4. UIKit Is Imperative, Not Declarative
Coming from React’s declarative “describe the UI, let the framework update it” model, UIKit feels foreign. You manually create views, set constraints, manage layout, and handle cell recycling. SwiftUI is Apple’s declarative alternative, but for a performance-critical image grid, UIKit’s UICollectionView is still the right choice — you get direct control over cell recycling, prefetching, and layout.
5. Grand Central Dispatch Is Powerful
Threading in Swift via GCD is much more ergonomic than Web Workers or even Node.js worker threads. DispatchQueue.main.async { ... } to post to the UI thread, concurrentQueue.async { ... } to decode images in the background — it’s clean and predictable. The main thread is always the main thread, not an event loop that might get blocked.
The Vibe Coding Process
Working with Claude AI (Opus 4.6) and OpenAI Codex (ChatGPT 5.3) on this was a conversation. I’d switch between the two depending on the task — sometimes one would nail a UIKit pattern on the first try while the other needed iteration, and vice versa. I’d describe what I wanted at a high level:
“I need a custom UICollectionView layout that places cells at exact pixel coordinates in a grid, without any of the extra spacing that UICollectionViewFlowLayout adds.”
Both AIs would generate the Swift code, and I’d iterate:
“The cells need to be square. And I need section headers that stick to the top.”
The key was that I understood the architecture — I knew I needed an LRU cache, a request deduplication layer, and a cell recycling system. I just didn’t know the Swift APIs. Claude filled that gap while I focused on the system design.
Some things the AIs got right immediately:
- The
forceDecodedpattern for pre-decoding images - The
[weak self]capture lists in closures - The
guard letunwrapping patterns
Some things required iteration:
- Getting the pinch-to-zoom math right (column count from gesture scale)
- Memory management across multiple cache tiers with cross-tier LRU eviction
- The zoom overlay’s coordinate system math and pan-to-dismiss gesture
- Caption editing flow: long-press → edit → save result back through the bridge
- Video playback integration from the detail card’s segmented control
- The nav bar and bottom bar show/hide animations synced with scroll state
Conclusion
The final native module is over 6,000 lines of Swift across 7 files. It delivers a photo browsing experience that genuinely feels like Apple Photos — locked 60fps scrolling, pinch-to-zoom between 1 and 6 columns, progressive image loading, HD zoom up to 6x, caption editing via long-press, GPS map overlays, video playback from detail cards, a native nav bar and bottom bar with view style and media filter controls, shimmer loading animations, and careful memory management across a 1GB cache budget with cross-tier LRU eviction. And the performance gap isn’t subtle. When you swipe through 48 photos on the native grid, every frame lands on time. The images are pre-decoded, the cells are recycled, and Core Animation composites everything on the GPU without a single layout recalculation. The same gesture on the web version — same phone, same photos, same network — drops frames, shows blank placeholders while images decode, and fights the browser for scroll priority. HTML and CSS have come an incredibly long way, and for most apps they’re more than good enough. But for a photo-heavy experience where every frame matters, native is just a different tier.
I could not have written this without AI pair programmers. Not because the concepts were hard — LRU caches and HTTP pipelines are universal. But because the implementation details in a new language, on a new platform, with unfamiliar APIs, would have taken weeks of documentation-reading and trial-and-error.
With vibe coding using Claude AI (Opus 4.6) and OpenAI Codex (ChatGPT 5.3), it took days. The code works. The app is in the App Store. And I still don’t really know Swift — but the code I shipped is solid, well-structured, and performant.
That’s the promise of vibe coding: you bring the architecture and the judgment, the AIs bring the syntax and the platform knowledge, and together you build things none of you could build alone.
A Note of Honesty From the Author
I have to come clean about something. This blog post itself was largely created by AI — specifically, I asked Claude Code (Opus 4.6) to read all the Swift files in my project and write this article explaining what each component does. Why? Because frankly, I needed to read those explanations myself to fully understand what the generated code was even doing.
I built a working, production iOS app in a language I don’t know. It’s in the App Store. It works great. The code is solid — or at least I think it is. But if you sat me down and asked me to write a
UICollectionViewdata source from scratch without AI help, I’d be lost. I can read the Swift now and follow what’s happening, largely thanks to writing this post. But “wrote an app in Swift” and “knows Swift” are two very different things in the age of vibe coding.Would I have done this with an app my livelihood depended on? Probably not. This is a side project, a photo gallery, and the stakes are low enough that I was comfortable letting AI drive the implementation while I focused on the architecture and user experience. For something mission-critical — financial software, medical devices, anything where a subtle bug could cause real harm — I’d want a human Swift expert reviewing every line.
I think that’s worth being honest about. The app is real. The code works. But the understanding came after the implementation, not before — and this blog post was part of how I got there.
One more thing: at some point I plan on offering Connection Road as a paid service — though honestly, that may never happen or could be way off in the future. Because of that, I’m not sharing the GitHub repos with the full source code. So if you’re reading this thinking “I want to build something like this” — well, you’ll just have to vibe code it yourself. :)